Monday, February 23, 2009

Bunny Easter Cookies


Bunny Easter Cookies
Originally uploaded by gensler97

I consider baking a craft. Especially when it is a decorated cookie, cake, or cupcake. I love these little bunnies I made a few years ago for easter. The flower necklace adds just enough character to the rabbit. This is also the only form of drawing I do. Everyone will go crazy for these fun cookies and think you spent the whole day decorating them.

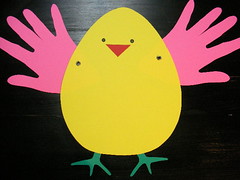
Easter Egg Baby


SANY0002
Originally uploaded by febielin

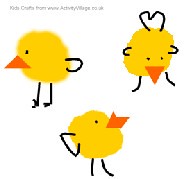
Thumbprint Chicks Easter Craft


Thumbprint Chicks
Originally uploaded by activityvillage.co.uk

Anything done with fingerprints or handprints is always a winning craft with moms and dads. We love to keep those special little projects that show the size of our children when they made it. For me it doesn't hurt either that this is about the cheapest project you can make.

These chicks can be used to decorate a card, a poster, or just a piece of paper. Kids can make a scene on a piece of paper and turn it into anything they choose. I can't use this project this year, as my kids are not old enough to draw the extra arms, legs, eyes, and beaks on each chick to make them unique. I hope I can make them some day.

Milk Jug Easter Basket


Big E's basket and booboo bunny
Originally uploaded by mslil65

I love this idea for an Easter Basket for school kids. I can make this with things I either have laying around the house, or will have laying around the house soon. I respect any projects that require recycling of household items or food containers. The most expensive thing I would need to buy for these is the green grass for the bottom of the baskets.

You can personalize these as much as you want. I have seen them painted white or grey. The opening have been smaller, so you can fit a few more eggs inside the basket. The faces can be made out of any materials you have at home. Have fun with this one!

Tuesday, February 17, 2009

Paper Plate Angels


I used this project for Christmas, but think it could be used any time of the year, for religious activities. I saw one on a friend's tree and decided, I can do that! The paper plates only cost a quarter, since I already had some at home and needed only a few. You can decorate the plates with crayons, markers, or whatever you have lying around. Pipecleaners were $1.00 at a Dollar Store. Pictures can be donated from each child, printed for $.15 each, or just drawn on another piece of paper and attached. Last but not least a stapler.

I think I liked the fact that they are stapled together the best because we didn't have to wait for drying time. I will say, it is tricky to staple them together. Also, these look so cute on top of those little Christmas Trees we sometimes put on tables. Especially if you keep one in each kid's room. My kids did this on their own and I left it there the whole Christmas Season.

To make the angels, first let the kids decorate their plates. They need to decorate the bottom side of the plate, if you were eating off of it.

After they decorate it, you cut the plate in half. Then cut one of the halves, in half again. The half will be the body and the quarters will become the wings.

Assemble the body, by creating a cone and stapling it together.

Next staple the winges onto the angel. This is the hardest part. Don't worry if they are not perfectly straight. It's just a fun activity for kids.

You can add a halo, by stapling a pipecleaner inside the angle and twisting it into a circle on top. Glue on your face and you are done.

This project was so cute, cheap and easy that it makes me want to make more with paper plates.

Paper Bag Album

I have recently started scrapbooking. I had never planned to scrapbook because of the expense of it. I had to get supplies last year to help out with a school project and decided I would spend that much money again to scrapbook for myself. My original project was paperbag albums. I had to repeat the project again this year, but decided to spend much less. I think I have cut the cost in half. I will be able to complete 2 dozen books for just over $100, and that includes picture development. It still seems like a lot of money, but double that and you will be close to what it cost last year.

My first step in saving money was to make the albums myself. I spent $20 on paper bags, which I bought on-line at
PaperMart.com. I split the cost with a teacher, who was making them for her entire class. There is a place about 45 minutes from me that sells these bags to businesses, but it was not worth the gas it would have cost me to go pick them up. You can buy these books already assembled on e-bay, but they cost a lot more than I was willing to spend. One thing I must say, is that making them myself, they will not be covered with a protective archival coating. This helps to proctect the pictures over time. Since it is just a school project, I was not worried about adding that feature. You can buy the spray at craft stores and protect your books if you choose to.

I punched four holes along the side of the bag and assembled them with 3 bags, instead of 4 bags, which is what you would buy on e-bay. That saved me five pictures for each bag, plus all the cardstock, glue and embellishments you may use. Not to mention my time.


Then I used the $.49 satin ribbon from Wal-Mart to bind the books together. I used 4 spools of ribbon for 24 books. I used a large plastic needle to sew the ribbon. Made it very easy.


>

Since each page needed a piece of cardstock, I found a 200 piece package of 8x8 cardstock at

Wal-Mart for $9.99. I bought 2 packages.


The cheapest picture development I can find is
Wal-Mart for $.15 each. The picture quality is just as good as Kodak and I can get them done while I shop.

One problem I have run into with these scrapbooks is getting my cardstock to stick to the bags. I have found the cheapest choice is
Aleen's Tacky Glue. It is a little messy, as you have to spread the glue with your fingers, but it holds very well. We used a few kinds of scrapbooking glue last year and it peeled off right away.


Spending Less While You Craft

The economy has everyone worrying about their jobs, and money. We are all trying to be creative and save as much as possible and change a lot of our spending habits. For many of us, we may be cutting back on eating out, going to the movies, taking vacations, or buying those designer clothes. For me, I have had a lot of projects to put together for my kids, their schools, or other community activities. I have tried over the last 2 years to do them all as cheaply as possible. When you have to replicate a craft a few dozen times, it can get very expensive. I hope this blog will help others to see how much you can do for a little amount of money.

My biggest money saver is scouring the internet to find cute, but cheap and easy crafts for kids. Also, I buy a deal when I see it and find that one way to put something together with a different product that is cheaper than the original. You would be surprised how much you can do for so little. I also have learned to respect the 'Dollar Store' market. You can sometimes find exactly what you need for only a dollar. It may have cost me $1.89 at a discount retailer, but when the Dollar Store is right next door, I will spend 10 extra minutes to save $5.00. You can't blame me.

I hope I can help you get creative and give you some resources to help you save a few dollars.
Related Posts Plugin for WordPress, Blogger...